Android Studio Emulator Is Back On Neverinstall

In the complex world of app development, developers frequently face challenges with running Android applications on local emulators. From hardware limitations to inconsistent performance across different devices, these challenges can significantly slow down the development process. Testing on a variety of devices and configurations is crucial, yet it often becomes a bottleneck due to these constraints.
Enter the world of cloud PC like Neverinstall. By shifting the workload to the cloud, developers can bypass the limitations of their local hardware. This move not only speeds up the development process but also brings a level of consistency and scalability that local environments struggle to match. The Android Studio Emulator, when run on a platform like Neverinstall, offers a seamless, efficient environment for testing and development. This integration not only addresses common emulator issues like slow performance and resource constraints but also enhances overall testing accuracy.
As we reintroduce KVM (Kernel-based Virtual Machine) support on Neverinstall, developers now have access to an even more robust and efficient cloud-based emulator experience. In this article, we'll explore how leveraging the Android Studio Emulator on Neverinstall can transform your development workflow, making it more streamlined and effective.
Getting Started with Android Studio Emulator
Downloading and Installing Android Studio Emulator
Embarking on your app development journey starts with setting up Android Studio Emulator. To get started, visit the official Android Studio website to download the latest version. During the installation, make sure to include the Android Virtual Device (AVD), which is essential for running the emulator.
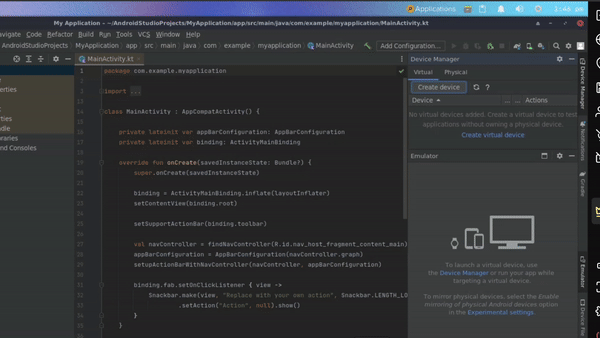
Setting Up Emulator inside Android Studio
Setting Up Your Emulator
Once Android Studio is installed, the next step is to set up the emulator. This process is intuitive within the Android Studio environment. Access the AVD Manager from the Android Studio dashboard to create and manage your virtual devices. This tool allows you to select from various device profiles, mimicking different types of Android hardware.
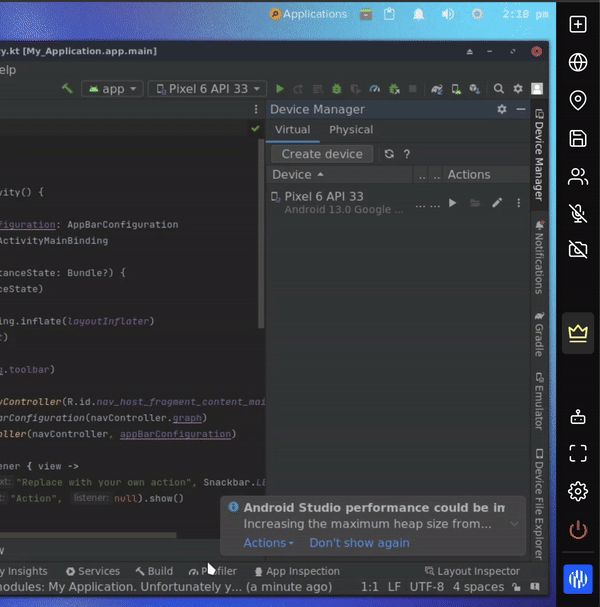
Launching Your First Emulator Session
Launching the emulator is as simple as selecting your desired virtual device in the AVD Manager and clicking the ‘Start’ button. This opens up a world where you can test your apps across multiple Android versions and device types without needing the actual hardware.
Troubleshooting Installation Issues
If you encounter any issues during the download or setup process, ensure that your system meets the emulator’s requirements and that your Android Studio installation is up to date. Common challenges like installation hiccups can often be resolved by checking system compatibility and updating software.
Properly installing and setting up the Android Studio Emulator is a critical first step in streamlining your app development process. With this tool, you gain the ability to simulate various Android devices and environments, enhancing your testing and development capabilities.
Common Challenges: Android Studio Emulator Not Working and Solutions
Identifying and Resolving Common Emulator Issues
Even the most robust tools encounter hiccups, and Android Studio Emulator is no exception. Developers often face challenges that can hinder their workflow. This section addresses some of these common issues and offers practical solutions to get your emulator back on track.
1. Slow Performance and Responsiveness
- A frequent concern is the emulator running slowly or lagging. This can often be attributed to inadequate system resources or incorrect emulator configurations. To resolve this, ensure that your computer meets the minimum hardware requirements and consider allocating more RAM and CPU resources to the emulator. Additionally, enabling hardware acceleration can significantly boost performance.
2. Emulator Fails to Start
- Sometimes, the emulator may fail to launch, leaving developers puzzled. This issue can stem from outdated tools or SDK components. Keeping your Android Studio and emulator updated is crucial. Also, verify that your system's BIOS settings are correctly configured for virtualization.
3. Application Compatibility Issues
- Occasionally, applications may not run correctly on the emulator, which could be due to compatibility issues with certain Android versions or configurations. Testing your app on different emulator profiles can help identify the root cause. Ensure that your app's target SDK version aligns with the emulator's Android version. This is also something you can off board to Neverinstall's AI assistance.
Package Installations Not Being Up to Date Solved by Neverinstall AI
4. Network Connectivity Problems
- If your emulator struggles with network connectivity, check the emulator's settings to ensure it’s correctly configured to access your machine's network. Sometimes, resetting the emulator's network settings to their default state can resolve these issues.
5. Graphic Rendering Glitches
- Graphic glitches are not uncommon, especially when dealing with high-resolution applications or games. Updating your graphics driver and enabling or disabling hardware graphics acceleration in the emulator settings can help.
Encountering issues with the Android Studio Emulator can be frustrating, but most problems have straightforward solutions. Regular updates, proper configuration, and understanding your development environment are key to a smooth emulator experience.
💡
Try checking out The Linux Advantage: Why Developers choose Linux Cloud PCs
Enhancing Performance: Optimising Android Studio Emulator with Neverinstall’s Cloud PC
Maximising Emulator Speed and Efficiency
When it comes to app development, time is of the essence. A common query developers have is "how to make android studio emulator run faster". Here are some tips to enhance the performance of your Android Studio Emulator, especially when leveraging the power of Neverinstall’s cloud PCs.
1. Utilising Cloud Power
- The first step in boosting your emulator's performance is leveraging cloud computer resources. Neverinstall’s cloud PCs offer significant computational power, allowing your emulator to run faster and more efficiently than on most local machines. This addresses the concern of why your android studio emulator is so slow by offloading the heavy lifting to more powerful cloud-based hardware.
2. Choosing the Right Emulator Configuration
- Selecting the appropriate system image and hardware profile for your emulator can greatly impact its performance. Opt for an emulator configuration that balances functionality and resource usage according to your needs.
3. Enabling Hardware Acceleration
- One of the key factors affecting emulator speed is hardware acceleration. Ensure that you have enabled this feature in your emulator settings. On a cloud PC, this often involves less hassle, as the cloud infrastructure is already optimised for high performance.
4. Streamlining the Development Environment
- A cluttered development environment can slow down your emulator. Keep your workspace and emulator configuration as lean as possible. Regularly clean up unused resources and close unnecessary applications running in the background.
5. Addressing Startup Delays
- If you’re wondering why your android studio emulator takes so long to load, consider the initial startup processes. On a cloud PC, these processes are generally more efficient, but you can also speed them up by preloading commonly used system images.
Enhancing the performance of the Android Studio Emulator involves a combination of leveraging powerful cloud computer resources like Neverinstall and optimising your emulator settings. By following these tips, you can ensure a smoother, faster, and more efficient app development process.
Running Android Emulator Without Android Studio
Exploring Alternatives for Emulator Usage
While Android Studio is a comprehensive environment for app development, there are scenarios where you might want to run an Android emulator outside of this integrated development environment. This section explores how you can use the Android Emulator independently of Android Studio.
1. Understanding Standalone Emulator Setup
- The Android Emulator can be used without Android Studio by directly downloading and setting up the emulator binaries. This setup is useful for those who prefer a lightweight environment or need to integrate the emulator into different workflows.
2. Downloading the Emulator Independently
- You can download the emulator binaries from the Android developer website. This process requires you to have the Android SDK tools installed on your system. Once downloaded, you can run the emulator from the command line.
3. Configuring the Emulator
- Configuration of a standalone emulator involves creating and managing AVDs (Android Virtual Devices) through the command line. This gives you the flexibility to customise device profiles according to your testing needs.
4. Use Cases for a Standalone Emulator
- A standalone emulator is particularly useful for continuous integration systems where you need to run automated tests. It can also be beneficial for developers who use IDEs other than Android Studio or require a more customised development setup.
5. Integrating with Different Development Tools
- The standalone emulator can be integrated with various development tools and environments. This flexibility allows it to be a part of a broader range of development pipelines, catering to diverse project requirements.
Running the Android Emulator without Android Studio offers flexibility and customization for developers with specific needs. Whether for testing in automated environments or integrating with different development tools, the standalone emulator is a valuable asset in the Android development ecosystem.
Managing Multiple Instances: Android Studio Emulator in Separate Windows
Optimising Multitasking with Emulator Instances
For developers working on complex projects or needing to test applications under various conditions, managing multiple instances of the Android Studio Emulator can be crucial. Opening these instances in separate windows enhances multitasking and efficiency.
1. Opening Multiple Emulator Instances
Android Studio allows you to run multiple emulator instances simultaneously. This can be particularly useful for testing interactions between apps, comparing different app versions, or testing across various Android versions and screen sizes.
To open an emulator in a separate window, simply start another instance from the AVD Manager. Each instance runs independently, allowing for parallel testing and development.
2. Streamlined Workflow with Separate Windows
- Running emulators in separate windows enables a more organised and efficient workflow. You can arrange the emulator windows side by side or on different monitors, making it easier to compare and contrast app behaviour across different instances.
3. Maximising System Resources
- While running multiple emulators, it's important to balance system resources. Ensure your computer has sufficient RAM and CPU capabilities to handle multiple instances without performance degradation. On cloud PCs like Neverinstall, resource allocation can be adjusted easily to cater to this need.
4. Use Case Scenarios
- Multiple emulator instances are invaluable for cross-version testing and ensuring app compatibility across a wide range of devices. They also aid in replicating complex user scenarios that involve multiple app interactions.
5. Tips for Efficient Multiple Emulator Management
- To enhance performance when running multiple instances, consider reducing the emulator window size and disabling unnecessary features or animations within each emulator.
Managing multiple emulator instances in separate windows is a powerful feature in Android Studio that significantly augments the app testing and development process. It offers a practical approach to simultaneous, multi-environment testing, which is essential for robust app development.
Advanced Troubleshooting: Resolving Specific Emulator Errors
Navigating Through Complex Emulator Challenges
Encountering errors in the Android Studio Emulator can be daunting, but understanding how to resolve specific issues is key to a smooth development process. One very simple solution we have at your fingertips is using our AI assistant to handle the more basic errors that pop up occasionally with Android Studio usage.
Let’s dive into some common errors, including the well-known x86 hardware acceleration issue.
1. Resolving the 'x86 Emulation Requires Hardware Acceleration' Error
One of the most frequent errors encountered by developers is: "android studio emulator: error: x86 emulation currently requires hardware acceleration."
This error typically indicates that the emulator is attempting to use x86 emulation without the necessary hardware acceleration support. To resolve this:
Enable Virtualization in BIOS: Access your system's BIOS settings and enable VT-x for Intel processors or AMD-V for AMD processors.
Install HAXM (Intel Hardware Accelerated Execution Manager): For Intel-based machines, ensure that HAXM is installed and updated. This can be done via the SDK Manager in Android Studio.
Use an ARM-based System Image: As an alternative, consider using an ARM-based system image, which doesn't require hardware acceleration but may perform slower.
2. Dealing with Emulator Startup Failures
If the emulator fails to launch or crashes during startup:
Update Android Studio and Emulator: Ensure you are using the latest versions of both Android Studio and the emulator.
Check for Conflicting Software: Some antivirus or security software can interfere with the emulator. Try disabling them temporarily to see if it resolves the issue.
3. Handling Network and Connectivity Issues
Network issues in the emulator can often be resolved by:
Checking Proxy Settings: Ensure that the emulator’s proxy settings match your network configuration.
Restarting the Emulator: Sometimes, simply restarting the emulator can resolve network connectivity problems.
4. Addressing Graphical and Rendering Glitches
- Graphics glitches in the emulator can be caused by outdated graphics drivers or incorrect emulator settings. Updating your graphics drivers or toggling between different graphics rendering options in the emulator can often fix these issues.
5. Leveraging Cloud Environments for Troubleshooting
- Utilising cloud platforms like Neverinstall can streamline troubleshooting. These environments typically have standardised configurations and updated drivers, reducing the likelihood of encountering complex hardware-related errors.
Tackling specific errors in the Android Studio Emulator requires a combination of technical know-how and understanding of your development environment. By methodically addressing these issues, you can ensure a more reliable and efficient emulation experience, further enhanced by the stability and power of cloud-based solutions like Neverinstall.
Embrace the Future of App Development with Neverinstall's Premium Plans
Unlocking Advanced Features with KVM on Linux Machines
In the realm of modern app development, having access to cutting-edge tools and resources is crucial. That's where Neverinstall's premium plans come into play, offering you a gateway to advanced features like KVM (Kernel-based Virtual Machine) on Linux machines. This access not only elevates your development environment but also aligns perfectly with the needs of professionals seeking robust and efficient solutions.
Signing up for Neverinstall’s premium plans is straightforward and opens the door to enhanced capabilities. With KVM on Linux machines, you gain the advantage of improved emulation performance, greater control over your virtual environments, and access to a broader range of development tools. This setup is ideal for Android Studio Emulator users who are looking for a more powerful and flexible development platform.
Why Neverinstall's Premium Plans Make Sense for You
Choosing Neverinstall's premium plans is a strategic decision for any developer aiming to stay ahead in the fast-paced world of app development. The combination of KVM support and the power of Linux machines provides a high-performance environment, crucial for intensive development tasks. This means faster build times, smoother emulation, and the ability to handle more complex projects with ease.
Moreover, the premium plans come with the added benefits of priority support, enhanced security, and regular updates, ensuring that your development process is not just efficient but also seamless and secure. Whether you are working on intricate Android applications or exploring new development frontiers, Neverinstall's premium offerings are designed to cater to your highest demands.
In a nutshell, signing up for Neverinstall’s premium plans is more than just an upgrade – it's a step towards redefining your development capabilities. Embrace the power of KVM on Linux machines and witness a significant transformation in your app development journey.
Run Android Studio Emulator on Neverinstall


